|
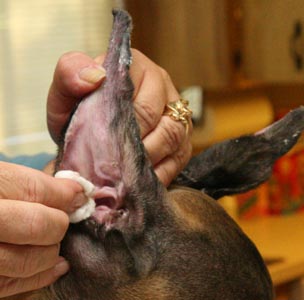
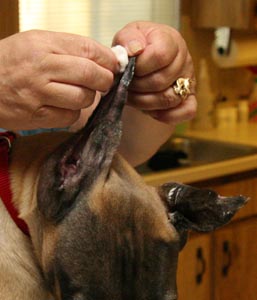
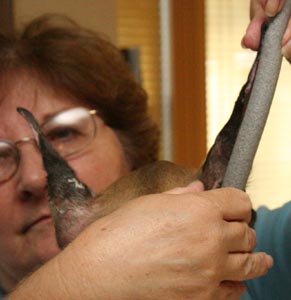
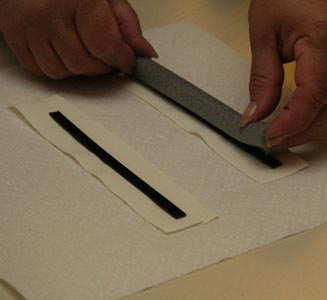
NO GOOIES, NO IRRITATION EAR TAPING (Aftercare of the cropped ear) The way in which you care for a cropped ear has a huge influence on whether or not that ear will ever stand properly. There are many methods of aftercare. I don't care for those that enclose the entire ear, creating a natural atmosphere for infection and the dreaded, 'gooies'. The gooies is that gloppy gray gunk that you often find when untaping an ear that has been up for a week or so. The following method will prevent this and is very effective and comfortable for the dog. Ears should not be taped until most of the scabs are healed after cropping surgery. If there are only 1 or 2 scabs left, you can cover those with cotton and a little of the antiseptic powder, and then tape over them. You will need 1. Pipe insulation tube (it's made of foam and you can get it at any hardware store). 2. Johnson & Johnson's "Zonas" 1" wide adhesive tape. You'll probably find this at your vets, or a hospital supply although some drug stores carry it. I recently noticed something called "Sports Tape" by Johnson & Johnson in the drug store. It seems to be the same stuff. If you can't find 1" tape, just rip the 1 1/2" lengthwise. 3. Benzoin compound (You might have to order this from a pharmacy) 4. Q-Tips 5. bandage scissors 6. Antiseptic powder, BFI powder or even Dr. Scholls foot powder. 7. alcohol 8. cotton balls A. Cut the pipe insulation length-wise so it's about 1/4 inch longer than the measurement from the top of the 'bump' to the tip of the ear. The width of the stay (pipe insulation) should be about 1/2 inch wide. You want it to be a little longer than the ear. B. Take the 1" tape and encircle one end of the insulation with a single wrap. Now start wrapping the tape backwards, sticky side out until you've covered the entire stay. C. Next, cut 4 pieces each of tape long enough to wrap around the base of the ear. (Approximately 9" long). Cut 4 pieces each of tape, approximately 6" long and 2 pieces 3" in length. D. PREPARE THE EARS. Clean the ears well with alcohol and dry thoroughly. Next, using a couple Q-Tips, paint the ear with the Benzoin compound. Paint the inside of the ear from the "bump" (See Figure 1) to the tip. Paint the outside of the ear to the tip and pay particular attention to the outside of the base. Allow to dry until tacky, about 2-3 minutes. E. Shake a small amount of the antiseptic powder in the little fold at the base of the ear on top of the head. (Figure 3). This will help prevent the "gooies" that usually start here. F. Next take one of the stays and set it into the inside of the ear just resting on the "bump". (Figure 1). G. Take the 9" long piece of tape and wrap it around the base of the ear and stay as shown in Figure 4. It is important to keep tension on the ear at this point. You want the base pulled out from the head so you can tape it properly in order for it to stand (Figure 3). Wrap in the direction of the small ear fold at base of ear. Wrap snug but not too tight and angle the tape down into the base of the ear where it meets the head (Figure 4). I. Now take the 2nd 9" piece of tape and wrap it around the ear and stay so that it's a little higher than the first piece of tape. Take a 6" piece and take it up the inside of the ear over the stay and down the back, going up and over the tip. Be sure not to make the tip bend and to shape the tape to the ear, not the other way around. The ear edge should remain flat. Use another 6" piece to wrap around the center of the ear and the 3" wraps the very tip (Figure 5). J. Repeat the procedure on the other ear. [Note that the ear will be pulled tighter into the stay than shown in the illustration.] For the first couple tapings after cropping (that is, after the incisions have healed, sutures are removed and the rack is off) it's a good idea to brace the ears across the top of the head. Once the puppy is holding his ears erect, the brace is no longer necessary. K. BRACING THE TAPED EARS (Figure 6). Cut a piece of tape long enough to reach from one ear to the other, circle the ear, return to the first ear, circle it, and wrap about half way back to the other ear. Ears should be held erect, and allowed to turn into a naturally held position, usually slightly out from the side of the head. You'll need a helper here to hold the ears while you tape. (You'll probably need a helper throughout the entire procedure, for that matter!) Start taping at the front of one ear, span to the other, circle it around the back of this ear, to the front span then continue the tape around the second ear and back across the front. Be very careful not to twist or turn the ears out of their natural resting position. Cut a short (about 2") piece of 1" tape and wrap around the span between the ears a couple times. You're done! Leave ears taped about a week, then take tape off and allow ears to rest for a day. Repeat until the ears are standing. If the ears constantly flop forward or hang out to the side, you have not taped the bases close enough to the head. You can try putting another wrap of tape around the base and see if that works. If not, you'll have to retape the whole ear. If, after a couple hours (or days or whatever) you notice that the puppy is scratching a lot at the tapes, or shaking his head and whining, something isn't right. Check the ear for irritation or the appliance for slippage. It's best to untape and then retape the entire ear rather than try a quick fix. There is no set amount of time it takes before the ears will stand. Average is probably about 3-4 months of taping. Most pups have their ears up by the age of 6 months. However it isn't unusual for some not to stand until they're a year old. Some just have poor ear leather that won't stand at all, or tips that curl inward. That's one of my frequent problems. A poor ear crop can be the cause also. EAR TAPING ILLUSTRATIONS |
||
|
|
|
|
|
|
|
|


| McEmn Great Danes | |||
| Nikki Riggsbee | Taping Ears | ||
| 813/654-3412 nriggsbee@aol.com |
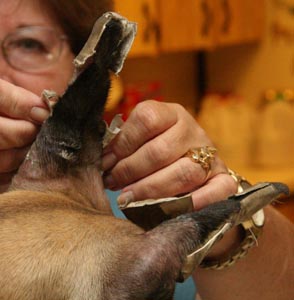
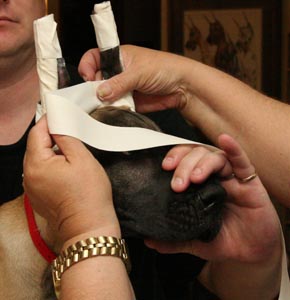
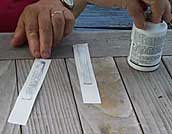
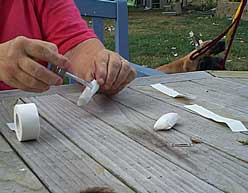
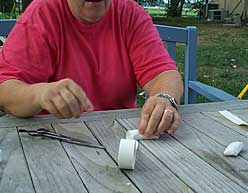
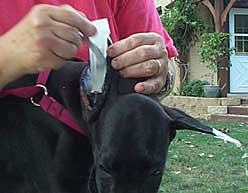
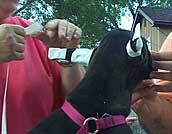
Below is a step-by-step process of how we are taping puppy ears. |
|
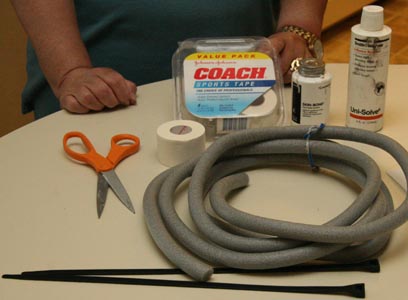
Current materials. The tubing is foam used to fill cracks too big for caulk. Glue is Skin Bond; an equivalent human-approved adhesive can be used. Glue remover is Unisolve. Long black items are cable ties. Johnson & Johnson Coach brand athletic tape.. |
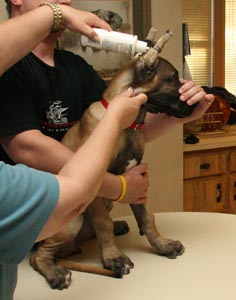
Unisolve on existing tape loosens the adhesive. |
Put Unisolve on all tape that has glue on it. |
|
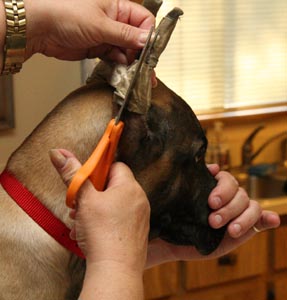
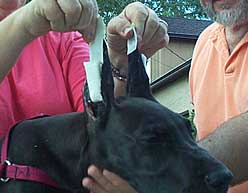
Cut off tape, making sure you don't cut the ear. |
You can put your finger under the tape to loosen it & to find a path to insert the scissors. |
Cutting off the old tape. |
|
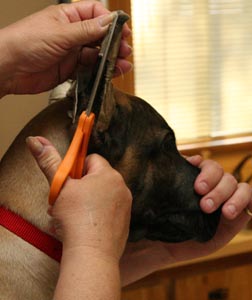
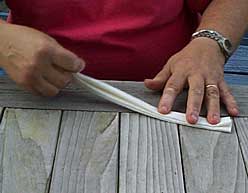
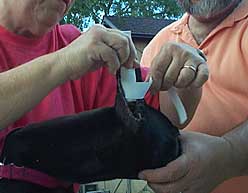
Cut tape - cut whereever it is loosest, not necessarily as shown. |
Peel back tape - already loosened with Unisolve. |
Remove tape slowly to avoid discomfort. |
|
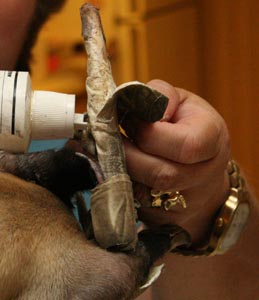
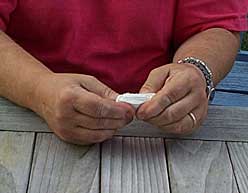
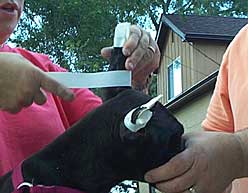
Use more Unisolve on places still glued. |
Put Unisolve at juncture of ear and stuck tape. |
Unisolve makes the tape come off easily. |
|
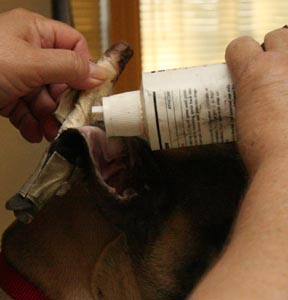
Clean ears with cotton balls and ear cleaner, such as alcohol or peroxide. |
Clean off Unisolve - it will prevent the new taping from sticking well. |
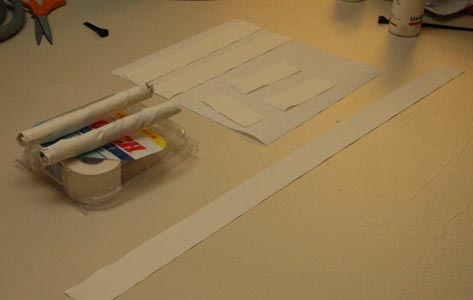
Measure how much foam you need. |
|
Foam should go from tip to deep in ear. |
Cut a piece of cable tie about 1/2 inch shorter than foam. |
Start building prop: Lay each cable tie on a piece of tape longer than foam. |
|
Lay foam on top of cable tie & tape. |
Making the prop... One end of foam extends 1/2 past cable tie - that end will go in the ear. |
Use tape to hold the foam & cable tie together. |
|
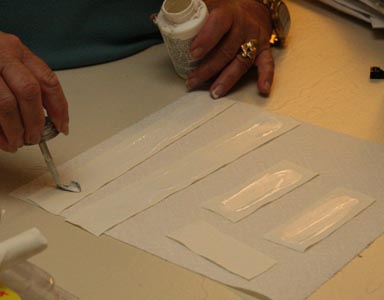
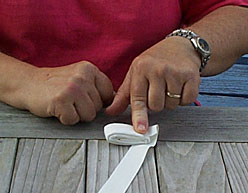
Begin backtaping prop by taping once around sticky side down. |
Reverse tape to sticky-side-out and spiral it up the prop |
Prop all backtaped |
|
Props; 2 longer pieces of tape (appr 13"), 2 shorter pieces (appr 5") Bridge: 1 tape about as long as your arm, another short 3" piece. |
Apply Skin Bond glue the 2 long and 2 shorter pieces of tape. Also apply glue to the edge of the prop which will go against the ear - opposite the side with the cable tie. |
Put the prop in the ear. The end with the extra foam goes into the ear as far as possible. The glued side goes against the ear. |
|
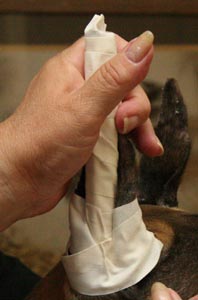
Begin taping the base with one of the longer glued tape lengths, starting at the back of the ear, wrapping towards the outside, and then around to the front and inside. |
Make sure the "hole" at the base of the ear is covered with tape so the prop can't pop out. Note that the verticle ear fold on the inside/uncut edge is folded by the tape. |
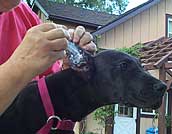
Wrap 1 small glued length of tape around the ear tip. |
|
Wrap the tape at the base & tip loosely. Too tight & the tape can cut the ear as the puppy grows. Press it to have the glue contact. |
One ear all taped. |
Inserting the prop - foam end down, glue side against ear - into the second ear. |
|
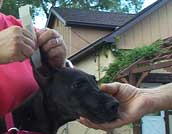
Taping the base of the 2nd ear. Note: right ear base will be taped counter clockwise; left ear base is taped clockwise |
If the prop is too long, cut off excess. Hold the ear tip to make sure you don't cut it. |
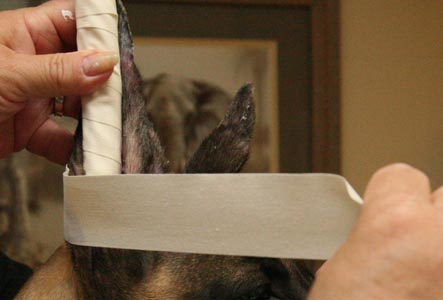
Begin the bridge that will go from the center of the base of each ear across the skull. The bridge tape does not have glue on it. |
|
The tape goes from the middle of the base of one ear to the middle of the base of the other. |
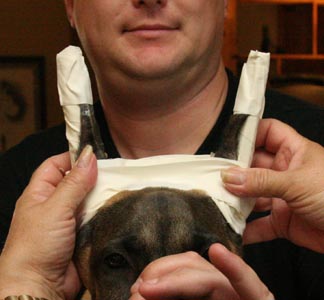
Go around the other ear. |
Go back & forth, sticking tape to itself across the skull. |
|
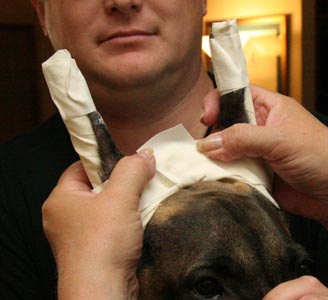
Note that the ears are not parallel. They should be wider apart at the tip than at the skull |
Use the smallest piece of tape to reinforce the bridge by taping around the tapes crossing the skull. |
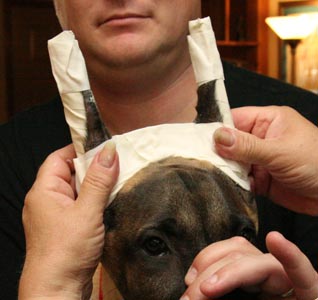
All done!! Hold/pet/play with the puppy for a few minutes until the glue is well dry. |


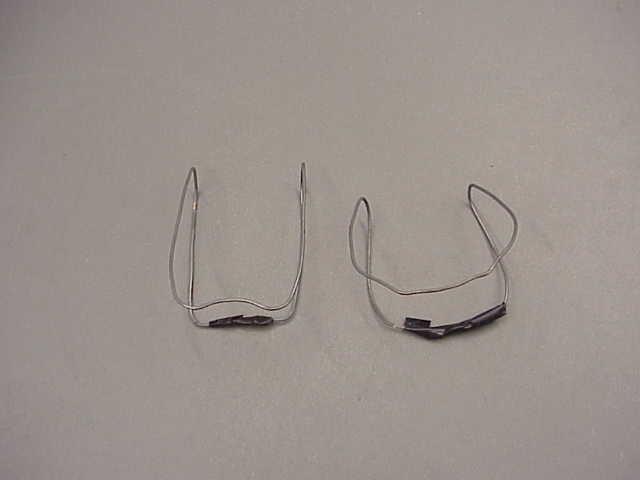
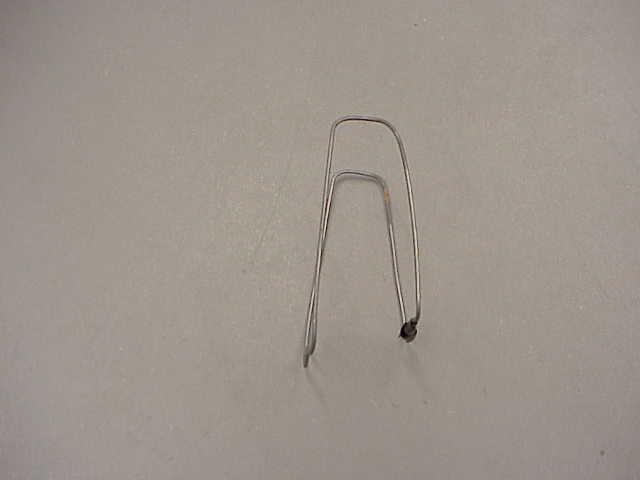
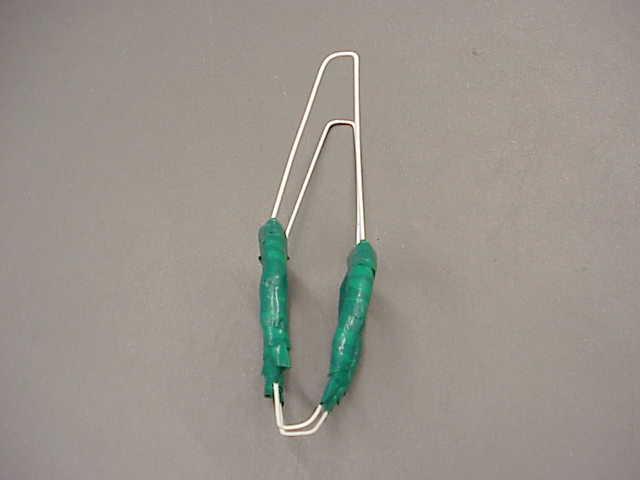
Ear Racks
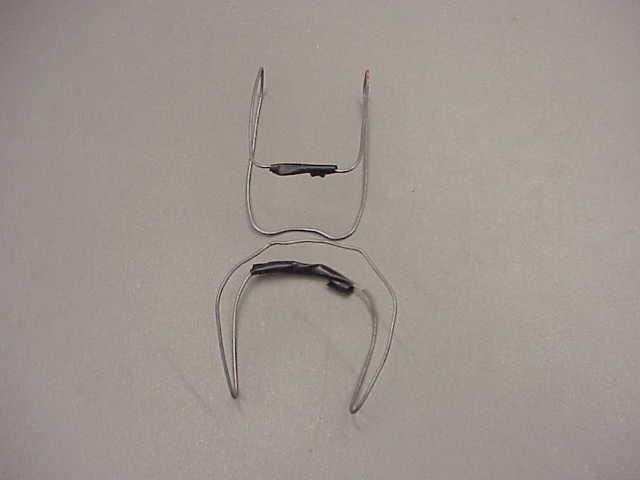
| I use Clothesline wire to make the racks. | Side View of Top Rack | The 2 Forms are taped together. |
 |
 |
 |
|
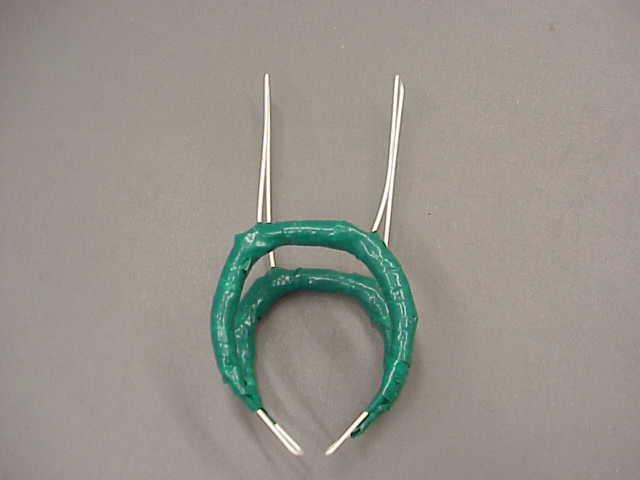
The wire is covered with paper towels for padding. |
||
| Rack is covered with waterproof tape. | Side View | |
 |
 |
|
| This rack was made with a coat hanger. Not as strong as the clothes line wire. | Note: Back is lower than the front so it rests on the neck correctly.. | |
 |
|
|
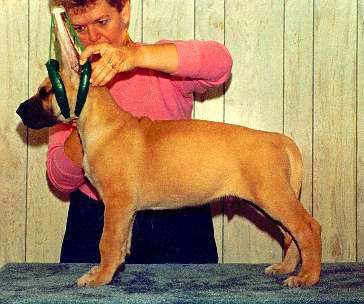
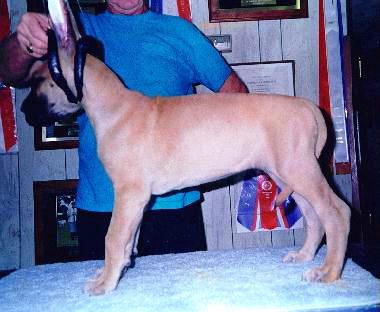
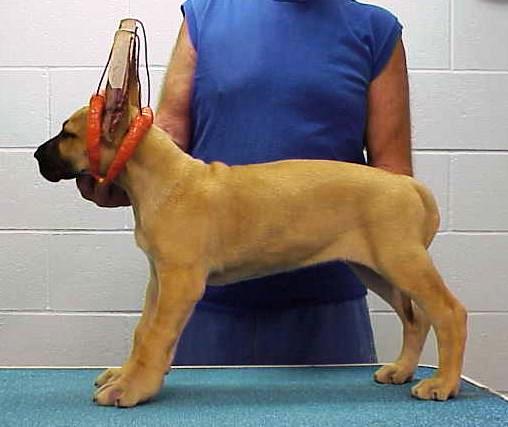
| This is Ch. Fridge @ 7 1/2 Weeks | This is Ch. Sommersby @ 8 Weeks | |
 |
 |
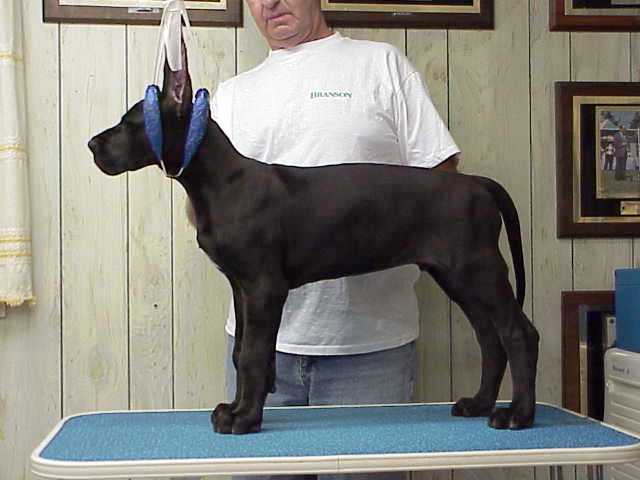 |
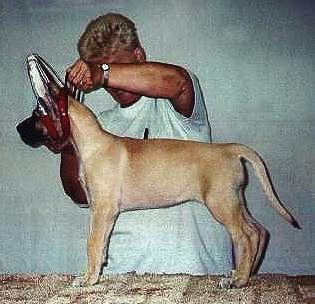
| This is Ch. Cherry @ 8 Weeks | This is Jo Dee @ 8 Weeks | This is Kohl @ 9 1/2 Weeks |
 |
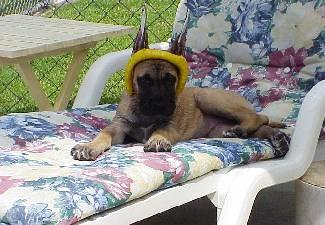 |
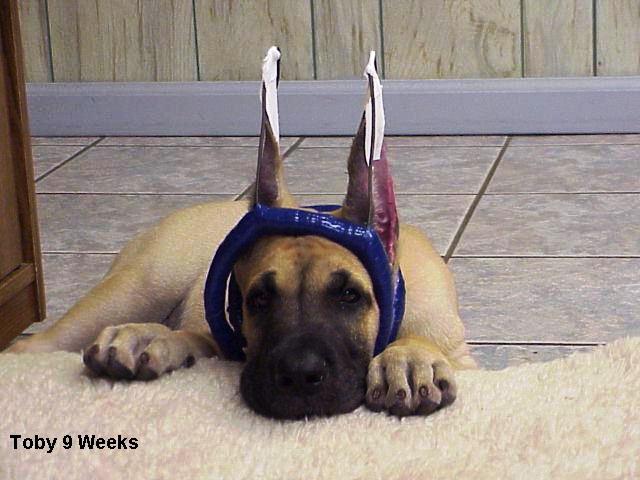
| This is Toby @ 9 Weeks | Shania @ 8 Weeks |
How to Tape Ears.
There is text, photos and illustrations of this process at this site to print out. READ THIS INFORMATION FIRST BEFORE ATTEMPTING TO TAPE EARS or you could ruin the ears as well as cause infection.
Have all materials read ahead of time before you begin the process, this includes 1-2 other people to assist.
Materials:
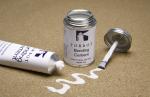
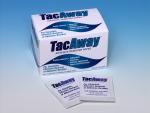
1). GLUE: Use TORBOT Liquid Bonding Cement -latex in a 4 oz can with a brush(not tube) (this replaces the old Skin Bond glue by Smith and Nephew) AND TORBOT TACaway Adhesive Remover to go with this cement. Normally, it wears off after a week anyway, but just in case you may want to get their companion product adhesive remover in case you want the ears down before a week.
NO OTHER GLUE IS APPROPRIATE OR SAFE TO USE.
To order this bonding cement and adhesive remover online: http://www.torbot.com or call 1-800-545-4254
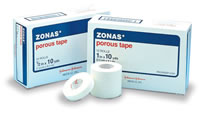
2). TAPE: Use Zonos Porous Tape by Johnson and Johnson brand - 1" -soft, porous, cloth tape which you will order on line or from your local pharmacy. To purchase tape call 800-861-3211 - or online:http://www.allegromedical.com/index.html
NO OTHER BRAND OR TYPE OF TAPE PLEASE.
For Pads and Splints
Use a square paper towels to make the pillow. The size of pillow will vary according to size of the ear and of course, increase in size with age.
NEVER use masking tape, waterproof tape or duct tape or they will have a severe reaction or the ear will rot off in nothing flat!
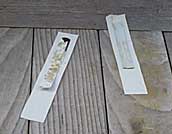
Corset Stays for Splints - You have two choices for or splints, also known as corset stays or boning, which are used as the structure to support the ears (Fig 1). Purchase these online from Jas Townsend and Sons, and order a variety of lengths ( 4"- 5"- 6" and a few 8 inch) so you can expand the length as they mature. These are 1/4" wide so as the puppies mature you may need to double up (place side by side) for a broader support.
www.jas-townsend.com
In a pinch you can use also use the black heavy duty 1/4" electrical zip ties that you can get from a hardware, electrical store or Home Depot, Lowes, Menards etc. These work and you can use 2 -4 depending on the width needed for the age of the puppy. Use NO wooden sticks please.
But we definitely PREFER the corset stays which you can use over and over for years.
The Purpose of Splinting
The purpose for this process is to splint the ear using the least amount of materials to get the maximum benefit and comfort considering the process is pretty unnatural.
Preparing the Stays
 |
 |
 |
|
Fig. 1
|
Fig. 2
|
Fig. 3
|
The length of the stay should be from the tip of the ear, down to just above "the button" on the inside the ear.
Measure, trim and prepare the "stay" by covering with a 1" piece of tape on both sides(Fig.3) make one piece a longer piece of tape so it will fold over the top of the tip of the ear to protect it. Apply glue to the sandwiched stay and the glue goes on the side with short tape(Fig. 2)and(Fig.10)
Take one sheet of paper towel and fold in half (Fig 4) then again in to fourths (Fig.5) and then fold it up into a pillow (Fig. 6), cover it with tape.(Fig.7)
This pillow will be glued directly on top of the Stay that rests on the little button inside the ear to give you some support to that area of the ear that likes to flop over. The pillow is approximately 1 1/2 inches wide by 2 inches long on younger puppies and it will increase according to the size of the dog. (Fig.7)
 |
 |
|
Fig 4.
|
Fig. 5
|
 |
 |
|
Fig. 6
|
Fig. 7
|
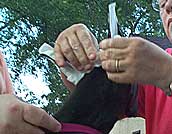
Now, cut 2 strips of tape ahead of time (1 is a spare) about 8-9" long - set aside out of puppy reach.
Then cut 2 strips of tape ahead of time that will be about 8-9 " long for the brace - set aside.
Here We Go
This is where all that table training has paid off. This takes at least two people, three are better for beginners!.
 |
 |
|
Fig. 8
|
Fig. 8a
|
Roll the pillow up in a strip of tape (Fig. 8A) and then paint surgical glue on the pillow - set aside and let it set up a minute until it is tacky.(Fig. 8)
Now paint surgical glue on the inside of the puppy's ear, running a strip of it from the bottom to the tip of the ear (Fig.9) Let it set a minute to get tacky as well.
 |
 |
 |
|
Fig. 9
|
Fig. 10
|
Fig. 11
|
Make sure the dogs head is looking straight ahead -NOT tipped up or down or the ears will not be set right. With top head plane level, pull the ear up gently so it is straight.
READ THIS SECTION BEFORE DOING IT:
Start at the bottom and set the glue covered stay just above the button resting on that little button shelf OR some dogs the button is set higher than others so you have to place the pillow over the button and down into the ear a little bit. This is why making a narrow pillow is important because we want air to get down into the ear. If the dogs ears want to tip inward after they are put up, it is because the pillow is not into the ear far enough to support the ear at the level of the base. Hope that is clear.
Then attach it up the ear to the very top folding the extra piece of tape over the top and securing. Repeat with the other ear. (Fig 10).
 |
 |
|
Fig. 12
|
Fig. 13 |
Paint glue on the lower end of the stay (Fig. 12) where the center of the pillow will be place. Note:
The pillow is the support, so align the pillow to be centered over the button which is a weak area of the ear. (Fig.13)
 |
 |
|
Fig. 14
|
Fig. 15 |
While you are facing the puppy, place the tape on the pillow and LAY the tape around the base of the ear - do not pull or wrap tightly - only LAY the tape around and gently squeeze to adhere. (Fig. 14) Continue with other ear (Fig. 16).
Make sure you do not go against the grain, there is a flap of skin there that needs to fold in it's natural direction.
Some people like to place a little Gold Bond Powder behind that flap before taping to help absorb moisture.
 |
 |
 |
|
Fig. 16
|
Fig. 17
|
Fig. 18
|
With someone holding both ears upright (Fig. 17), place a piece of tape across the front and back to make a support bar, not getting the ears bent in too close or out too loose.(Fig.18).
Provided there is no odor, swelling or sores, you will see they start to come down themselves in a few days. This will vary depending on whether the puppies are part of a litter or alone in a family. The first time they are taped it is generally 7-10 days. Just WATCH THEM DAILY.
When they are starting to fall apart, the adhesive wears off and you can gently pull the stays away and get them ready for the next taping, after a couple of days rest. You may need to use adhesive remover on a Q-Tip to help remove the stay from the tip of the ear.
BE CAREFUL NOT TO PULL THE TIP OF THE EAR OFF WHEN YOU ARE TRYING TO REMOVE THE TAPE!!!
I leave them down a day or two to rest, cleaning them with soap and water afterwards or before retaping. Make sure they are dry and there is no moisture under that flap of ear skin that is on the front of the dogs ear, or it will develop bacterial infection or fungus. You might want to powder that flap with medicated gold bond before retaping.
Frequency Of Taping
The general time between retaping is initially about 7-10 days and as they mature it may be that you have to redo them them from 5 - 7 days. You simply have to check them daily for sores and making sure they are STRAIGHT UP, and the dog is able to manipulate them so they strengthen the muscles of the ears across the top of the head. You do not want the pillow popped out, because the ear then folds inwards causing a permanent crease. If this happens, you may have to simply reposition the pillow and redo the brace without removing the stays.
The length of time for taping an ear is individual, based on the type of ear leather, the cut, the particular animal so do not give up. I have some dogs ears stand by 4 months and others we taped until they were older. Normally once they get past the teething stage at 6-7 months the ears start to stand as long as you have been diligent with your taping. Always check daily for discharge or odor. Let the ears rest at least 24 hours to air out before each retaping.
The Ear Taping Illustrations also located at this website are courtesy of Phyllis Lockwood of Willowrun Kennels.
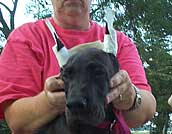
Taping An Older Puppy
At about 5 months of age when the tough teething period starts, the ears often get limp again or start to break in the middle. This is one method of taping the ears at this point, as long as the bases are firm and standing properly.
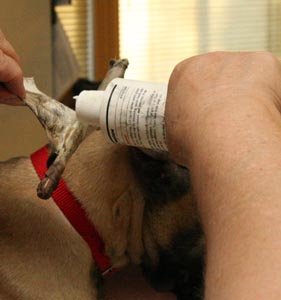
- Take two Large "Breathe Rite" nasal strips (no other brand works!). Put one on top of each other, for double thickness and support. Make sure the bottom one still has the sticky side available to glue in the ear. Red strip represents the Breathe Right nasal strip in photo.
- Paint Surgical Cement on the sticky side of the doubled up Breathe Rite Strip and let dry a minute or two.
- Paint Surgical Cement vertically on the inside of the dog's ear, making sure the Breathe Rite Strip will be place at the center of where the ear folds over or breaks - the weak spot - so there is support top and bottom of the break/fold.
- Let the glue set up a minute. Then pull the dog's ear straight up and press the Breathe Rite Strip in the ear (represented below in red). The wrap a 1 - 1 1/2 piece of cotton tape around it slightly cupping the ear for support (represented by white strip).
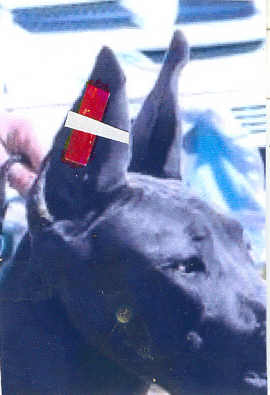
- Have a cookie handy to distract dog from shaking the head when finished and praise the puppy for a job well done!. If you are lucky...this will last 3-5 days before having to redo the tips.